I am so thrilled for your comments about your favorite project so far - thank you so much! Remember, you have until today at midnight to tell me about your top three projects and have a chance in SECOND giveaway (of a secret prize!), just comment on the previous post picking your top 3 projects.
However - the BLOG HOP PARTY is going on until Saturday - so go hopping and winning some great giveaways! Leaving the comment here on my blog gives you a chance to win mine!
Now let's get to work and make this happy little Santa ornament that can also be a creative, made-with-love gift card holder, to make the gift even more special! It is easy and fun!
NOTE: I cut my strips along the whole width of fabric and that was enough to make 8 ornaments
- enough batting to back each ornament (5" strip that is about 60" long would be enough for 8 ornaments), or double that amount if you are making a gift card holder
- 5-6" long piece of ribbon for hanging
Let's make this little Santa:
1. Start with 3 stripsthat you cut (see above) and join them together, LENGTHWISE, with 1/4" seam. Be sure to have a proper order of colors: RED-BEIGE/ROSY-WHITE (see photo). Press both seams towards the rosy (thin) strip - this will raise the strip a bit and look more like Santa's face. 2. Fold the strip set back so that the seam between red and rosy fabric is on the bottom (see photo on the right) - now you have it ready for cutting!
3. Basically, you need to cut 60 degree diamonds from this strip-set, and one EASY way to do that is to use the 60 degree triangle ruler, like the one I have (love my Creative Grids rulers! :) ). The line on the bottom that you would be aligning with is the 4 1/2" line:
HOWEVER - if you don't have a ruler like that, NO PROBLEM! Here is how to use your regular, general purpose ruler (all the good ones have those "angle" lines on them, and this is when they do come in handy!). So bear with me - I will show you how to use regular ruler in this step-by-step explanation.
1. First find the line on your ruler that has a 60 label on it. Pencil is pointing on the line on my ruler and close-up photo is showing it better.
2. Align that line with the BOTTOM edge of your folded strip-set, just like shown on the photo, and mark the line along the RIGHT side of the ruler (as shown above).
3.To mark the line on the other side - without moving the ruler much from the previous position - find the OTHER 60 degree line - pencil is pointing to where it is on my ruler (photo1). Align that line with the TOP edge of your strip set (pencil pointing on photo 2), and bring the left edge of the ruler so that it is where your first marked line ended (photo 3). Mark the line along the left edge of the ruler (photo 4) and VOILA! Your 60 degree triangle is labeled!
Now you need to label as many of these as you can fit on the strip set and then cut on those lines (photos A-C)
When you open up your strip - TA-DAH!! Little Santa!! (photo D) I got 8 of them from one strip-set (strips cut along the whole width of fabric)
NOTE: For Santa, you will use ONLY the pieces that have rosy fabric in the middle of the diamond - there are all these other diamonds that are a leftover... WAIT! We will use them too! Those cam be used for the BACK of your Santa ornament or gift card holder with a little extra work! Here is what to do:
1. Take the leftovers and open them up (photo 1 and 2). Tug a little and those few stitches will come apart - to separate two triangles (photo 3). Place the RED triangle on the bottom of the white one as shown on Photo 4. Join those two (on the wide side), with 1/4" seam and you will have another little Santa (photo 5)! Well, this one will have a piece of the "face" fabric on the bottom, but it will be on the back of the ornament, so good enough! :) White part of it is perfect if you want to write a message on it!
Now to finish the ornament or make a gift card holder:
1. If you are making just an ornament:
- Cut a strip of white batting (it could be white fleece or white felt), about 5" wide and place your Santa on it as shown (photo A). All you need to do is cut the piece of batting about 1/4" bigger (on all sides) than the ornament! To do this, I placed my ruler so that first 1/4" line is along the edge of the Santa and cut the batting with my pinking blade (photos B and C).
- First put the Santa BACK piece (one you made above from leftovers) on one side of the batting and stitch it in place (I used just a plain straight stitch, close to the edges, since it will be covered with decorative stitch later. Alternatively, you can just baste (or glue) it in place and wait for the stitching from the front.
- Place Santa to the front of the batting and stitch it in place - I used some nice decorative stitch on my machine - fun!
- Draw two little eyes and some eye-brows with permanent marker, stitch a little strip of same white batting for the mustache and stitch a piece of ribbon for hanging together with a pompom or decorative button and VOILA - your little Santa ornament is done!
If you are making a gift card holder:
- First, for this you will need TWO pieces of batting cut the same way as above (if you are cutting with pinking blade, it is the best to cut them BOTH in the same time (two layers of batting), since then wavy lines will match!)
- Place each Santa piece (front and back one) on their own piece of batting and stitch them (use decorative stitching, it is so much fun!)
- Decorate your Santa's face same as above
- Place front and back together (so that two battings are next to each other) and stitch them together but ONLY from the point shown by RED arrow, along the "beard" part to the BLUE arrow. I used straight stitch that was going right along the side of my decorative stitching and it looks great (you can also use invisible thread). Make sure not to catch the mustache in stitching (ouch! poor Santa... :) )
- Once two pieces are together, stitch a ribbon on the top by stitching one end to the front and one end to the back piece and - TA-DAH!! Your Santa gift card holder is done!!
Of course you can decorate your Santa in many different ways and have lots of fun! It is big enough that you can tuck in some candy or other small goodies, besides the gift card, or just fill it up with candy for a sweet little gift! The white part on the back of the Santa is great for writing a message to go with your gift - I am sure anyone getting a gift card or candy or ... whatever, in such a cute holder will be twice as delighted!

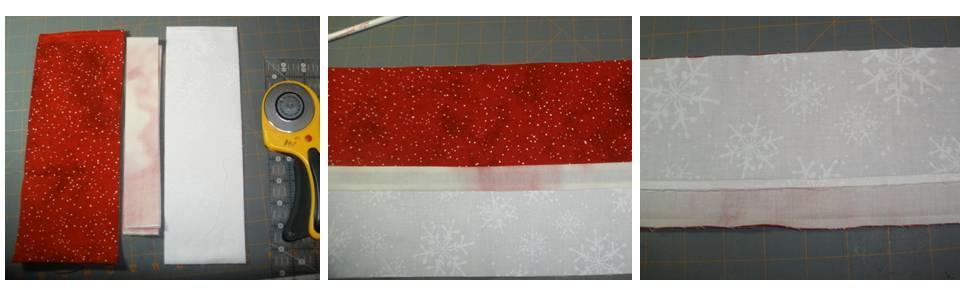 1. Start with 3 strips that you cut (see above) and join them together, LENGTHWISE, with 1/4" seam. Be sure to have a proper order of colors: RED-BEIGE/ROSY-WHITE (see photo). Press both seams towards the rosy (thin) strip - this will raise the strip a bit and look more like Santa's face.
 1. First find the line on your ruler that has a 60 label on it. Pencil is pointing on the line on my ruler and close-up photo is showing it better.
 3. To mark the line on the other side - without moving the ruler much from the previous position - find the OTHER 60 degree line - pencil is pointing to where it is on my ruler (photo1). Align that line with the TOP edge of your strip set (pencil pointing on photo 2), and bring the left edge of the ruler so that it is where your first marked line ended (photo 3). Mark the line along the left edge of the ruler (photo 4) and VOILA! Your 60 degree triangle is labeled!
 1. Take the leftovers and open them up (photo 1 and 2). Tug a little and those few stitches will come apart - to separate two triangles (photo 3). Place the RED triangle on the bottom of the white one as shown on Photo 4. Join those two (on the wide side), with 1/4" seam and you will have another little Santa (photo 5)! Well, this one will have a piece of the "face" fabric on the bottom, but it will be on the back of the ornament, so good enough! :) White part of it is perfect if you want to write a message on it!
 - Cut a strip of white batting (it could be white fleece or white felt), about 5" wide and place your Santa on it as shown (photo A). All you need to do is cut the piece of batting about 1/4" bigger (on all sides) than the ornament! To do this, I placed my ruler so that first 1/4" line is along the edge of the Santa and cut the batting with my pinking blade (photos B and C).
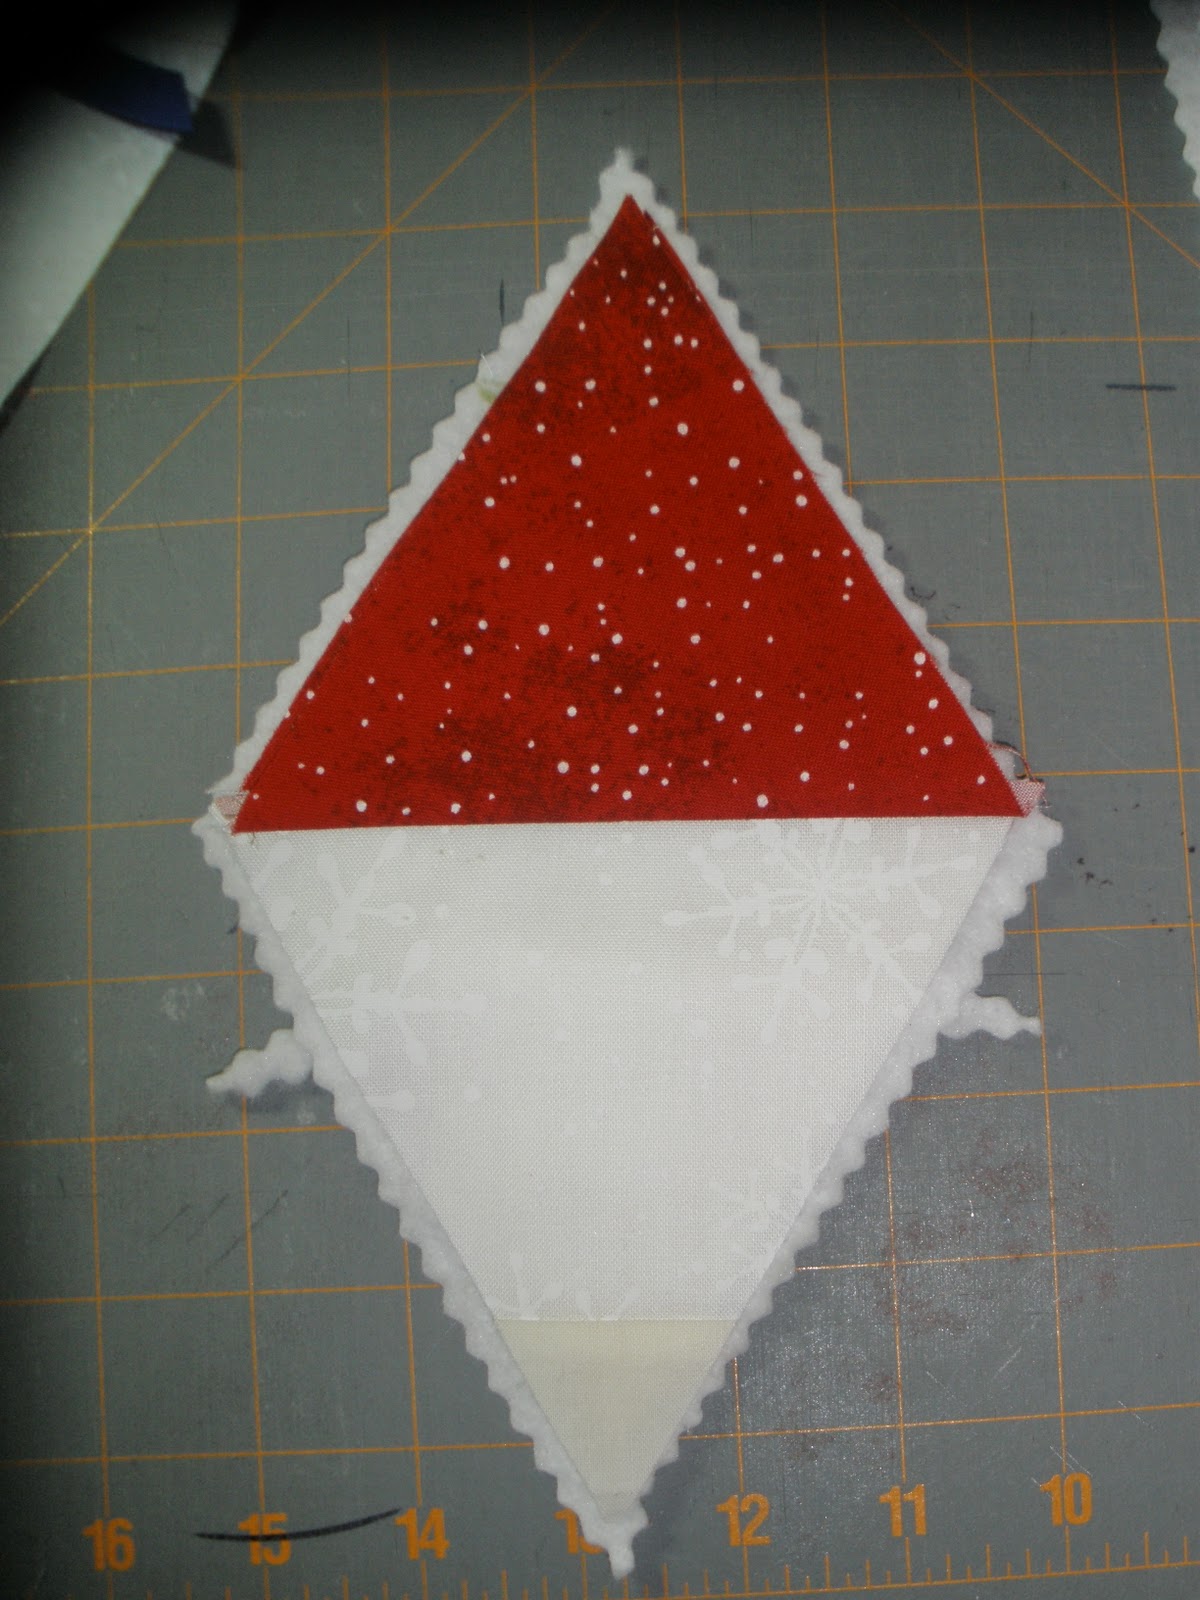 - First put the Santa BACK piece (one you made above from leftovers) on one side of the batting and stitch it in place (I used just a plain straight stitch, close to the edges, since it will be covered with decorative stitch later. Alternatively, you can just baste (or glue) it in place and wait for the stitching from the front.
 - Place Santa to the front of the batting and stitch it in place - I used some nice decorative stitch on my machine - fun!

