I am hanging my head in shame for slacking off on tutorials, but totally coming back now! July is my birthday month and I am determined to have a fabulous one, blogging my quilty heart out! :)
However, just like any time-saving technique, it can bring more trouble than good if not done with some care, do you agree?
Quick digression here: lately I have been playing a lot with Art Gallery Fabric and I am so in love! :) They feel so beautiful and really live up to their motto "Feel the difference"! So for this tutorial I decided to extend my enjoyment and pulled out my treasured AGF stash... Oh boy! There went a lot of time, just playing with those!! Of course, I couldn't decide at first... see what you think:
All so yummy, right? :)
Well, I might be very well doing ALL of them eventually, but for now picked the very first one - AGF, Pat Bravo's Poetica collection (love the name!).
OK - back to teaching now!
STRIP-PIECING - here is what I find to be several important steps that should be done right, for ANY strip-piecing to work well:
1. Cutting STRAIGHT strips across the width of fabric
My students can tell you that I spend a whole class on how to do accurate rotary cutting and I truly believe that this is where it starts - that is even more important with strip-piecing!! You can find all the steps and details about accurate rotary cutting in my
Basics of accurate rotary cutting tutorial
but here are few key steps again:
- once you double folded your fabric (see tutorial above!), you need to square-up the cut edge
- To do that, line up nicely the horizontal line of your ruler with the double fold (pencil pointing at the horizontal line) , hold ruler in place firmly and cut
Aligning the horizontal line with that bottom fold assures that your cut will be exactly 90 degrees and therefore your cut strip will be straight - no "W" strips!
- Now you are ready to cut your straight strips - for this runner, you will need mostly 2 1/2" wide strips, so align 2 1/2" line with that freshly cut and straightened edge - BUT! also
always, always align that bottom horizontal line too!! (pencils point to BOTH lines being aligned)
Always aligning BOTH of those lines will assure straight strips, and if you see that you can't align both, that means things slipped a bit and it is time to re-square the fabric (Step 1) - and that does happen, we are all humans, after all. :)
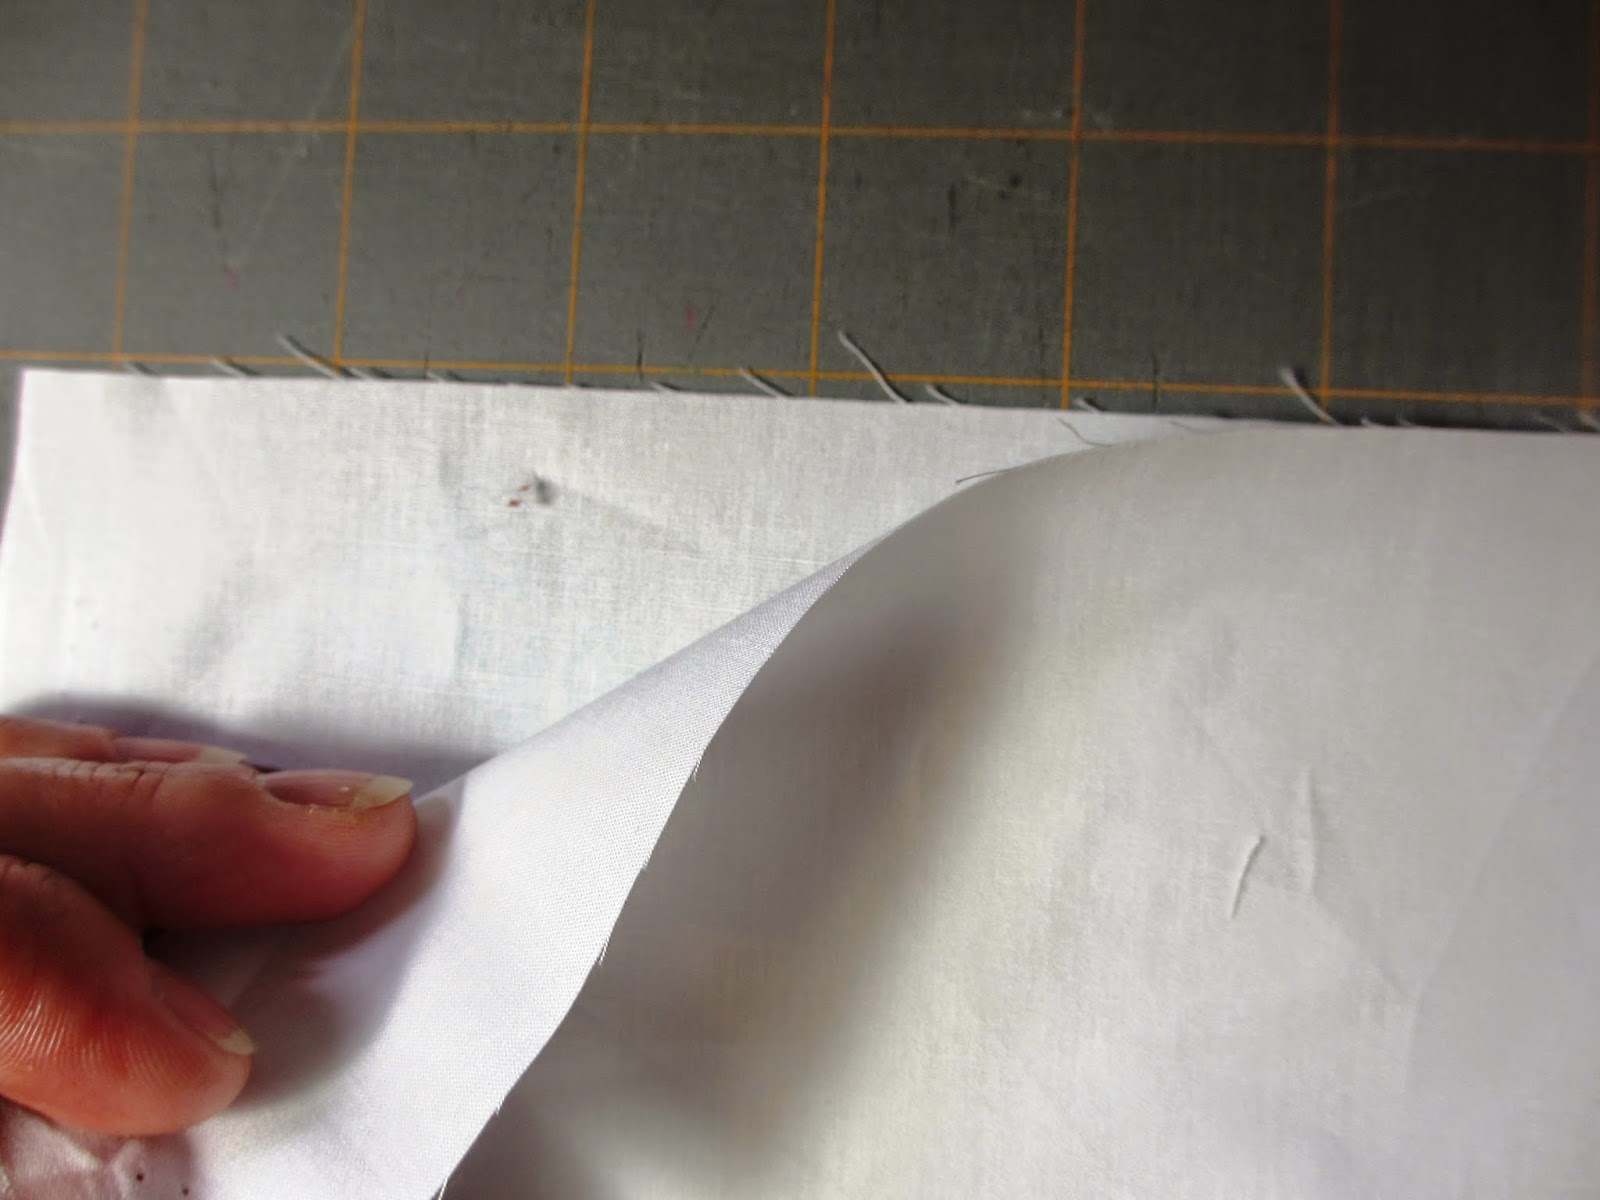
Here is my strait cut strip, and once I unfold it - that fold part is indeed straight!
For this table runner you will need total of 9 strips - 7 of them are 2 1/2" wide and two outer ones are 5" wide. In terms of fabric - you need total of 5 different fabrics - 2 strips of each, except the middle one (only one strip). Here are mine:
Now for second step towards successful strip-piecing:
2. Stitching strips together with accurate and consistent 1/4" seam
1/4" seam is always important, but in strip-piecing, having it also be straight and consistent really makes a big difference. Lots of you maybe use your 1/4" foot and then follow the edge of the foot, or a line marked on the sewing machine, and when you are stitching just short seams (regular piecing), that can work fine, but my experience is that, when strip-piecing (hence, stitching a LONG, ~40" seam), it gets really tiring to follow that line and often it "slips" a bit here and there...am I right?
That is why having some kind of a GUIDE for your 1/4" seam helps a lot! I love and use a self-made one - Dr. Scholl's Molefoam cut in strips! I have a whole tutorial on this and you can find it
HERE
In few recent years some machine brands also made a quarter inch foot with a guide and I do use that too, for my PFAFF - either one will giver you that CONSISTENT 1/4", and in strip-piecing that means a lot!
OK, on to piecing these 9 strips for the table runner!
After you lined them up in order (above), piece them together either one after the other, or in pairs first. I like to chain piece (A LOT!), so I piece my in pairs first. Here they are, ready to go, with the first pair already in the machine:
ANOTHER TIP: if you have it, use your "needle down" setting on your machine! Big help!
I don't pin while strip-piecing - I find that I can re-align my strips as I go and with that needle down setting, that works great.
Once you sewed the PAIRS together, press those seams first and then proceed with next sewing! I know we all like to "zoom through it" and then press later, but when you are sewing many strips together (more than 2 or 3), pressing at the end can be really cumbersome and therefore not as neat. That brings us to the next step in good strip-piecing:
3. Pressing the long seams
I know that quilters can firmly stand in two separate categories - pressing seam to one side or pressing open. I do it as it makes more sense to me and as the project requires at the time. I have to say, most of the time it is pressing to ONE SIDE, rather than open, but there are some cases where pressing open is better. Not here. For this project, you would want seams pressed to one side, and in the whole strip-set - all to the same side.
But lets start from the beginning - pressing long seams after sewing strips in pairs.
- I like to first set my seams - just press down as it is
As you are doing this, here is another TIP - always have the strip that you want your seam to be pressed TO, on the top. In other words, if I want seams pressed towards this blue ovals fabric - that one is on the top.
- then start from one side of the long strip, open up the top strip (kinda like a page of the book?)
- and make sure you push that top strip all the way (so no "pleats" are created as you press)
- hold in place and place the iron on top
- now just work like that along the whole length of the strip - opening the top one, holding the bottom one down on the board and pressing as you go. The trick to have that seam nicely pressed is to hold that BOTTOM strip on the ironing board, so that it doesn't lift up, because then the seam beneath can flip to other side. I do it like this:
- and here is the whole strip pressed, seam exactly where I want it.
NOTE: I feel that pressing seams from the RIGHT side f fabric always gives me better control than pressing from the back.
So here are my pairs of strips, ready to be sewn into "fours", with that last, 9th strip extra (wide white one on the left):
When you are strip-piecing multiple strips together (more than 2 or 3), there is another very important tip:
4. Sew adjacent seams in opposite directions
We all know that as you stitch long seams fabric does stretch just a little but - that is just the nature of the process. When you are strip-piecing many seams and do them all in the same direction, you may end up with a "bow" shaped strip-set! To prevent that - sew every next seam in opposite direction. One from top to bottom, next one from bottom to top.
If you sewed pairs of strips together as I just did, it is ok that we did it all in the same direction, from top to bottom:
Because now when sewing the pairs together, we will go from bottom to top:
and that will make them exactly alternate as it should!! Easy! :)
Once you sewn the "fours" you just need to sew them together and add the last, 9th strip to complete the whole strip-set.
Remember to press all seams in the SAME direction! (it does make the next sewing step easier).
Here is the whole strip set sewn and pressed:
All seams pressed to one side:
OK - strip piecing part of strip-piecing is DONE! :)
Usually any strip-piecing pattern you use, involves cross-cutting your strip-set to make the next step - this one is no different, and of course, there are some good tips for that too.
Here is my strip-set, and obviously a bit too wide for the long ruler I have:
So, I did fold my strip-set in half. O know, that can look scary, but if you are careful, it will work just fine!
Fold carefully in half, making sure it is straight:
And now is the time to cross-cut this strip-set into 2 1/2" wide segments. Again, just like with fabric cutting, you will need first to square-up the edge and in this case, get rid of selvages and un-even edges:
Process is really the same, only here I line up the horizontal line of the ruler with the stitching (of the first seam from the bottom), rather than with the fold - it is more accurate.
Sometimes, if your thread is well matched to the fabric, that can be a bit hard to see, but if you focus on the two sides of the ruler, you can align that way (pencils pointing to where I look when lining-up the ruler).
Once you squared and cleaned-up the edge, cut 2 1/2" segments from your strip-set. (remember to always line-up BOTH horizontal line and the measurement line, to have straight cut segments too!)
IF you are used to it, you can also use June Taylor ruler for this, it does make the process quicker, but it also requires some getting used to. I was hesitant about it at first but now I do use it (carefully!) when cutting multiple strips:
Since it can be easy to mix the sizes here, I like to label mine (pink tape), just to make sure. :)
So here are all our segments cut!!
Time to line them up for next step!
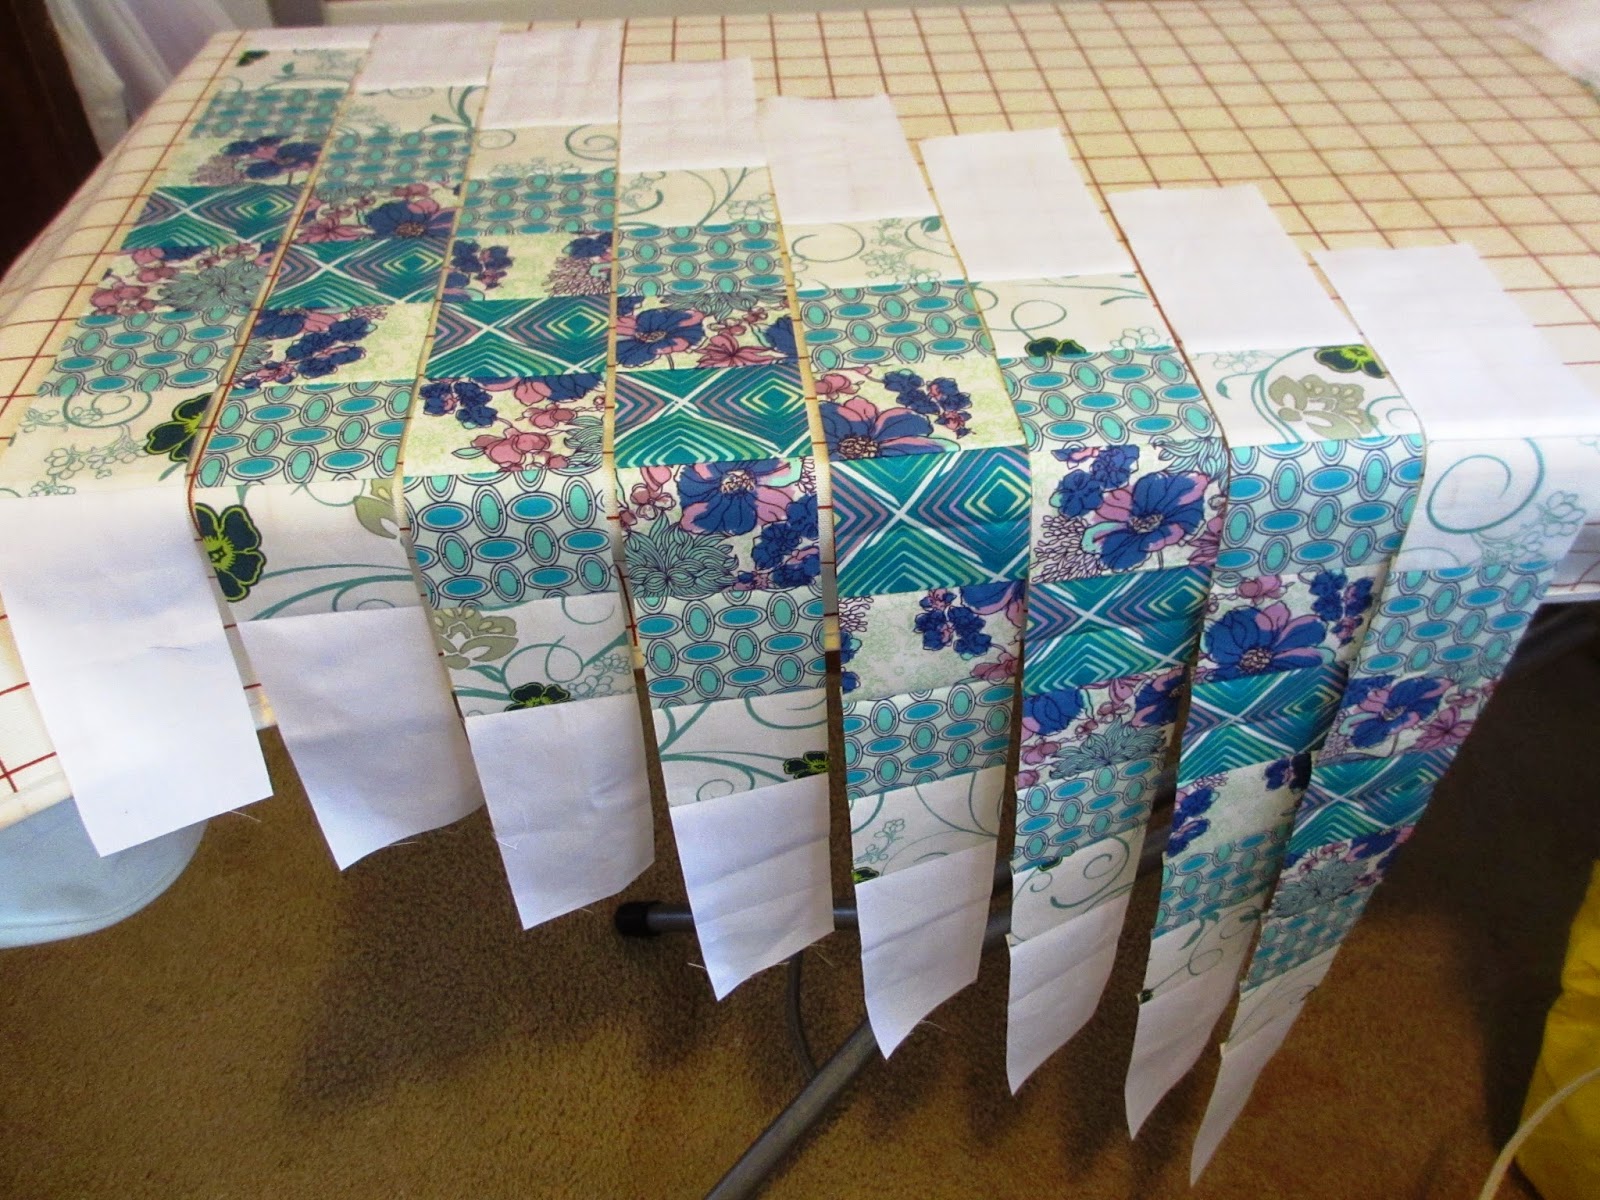
Here is how this works: line the segments one next to the other but each next one, one "step down" :
Here they are hanging on my ironing board:
I transfer them next to my machine and they are ALMOST ready to be sewn exactly like that ("stepping down" with each segment):
I am saying ALMOST, because before doing that, you want to
take every other segment and turn it 180 degrees (pencils pointing at segments to turn around).
Why are we doing this? Remember how we pressed all the seams in the same direction? Well, to sew these segments together, it would be very helpful to have those
nested, opposing seams, but since all these come from the same strip-set, all the seams go in the SAME direction now. Turning every other segment around will achieve just that - seams going in opposite directions - great for matching them!
Here is what I mean by opposing, nested seams:
And here is how that works while sewing:
And yes - you saw that right - I did NOT pin anything!
If you did everything right (cutting straight, pressing nice, turning every other one...), they really all match, nest together and fit nicely! I am not saying that I don't pin EVER, just in this case, I don't have to. :)
One more tip: notice how in the photo above the seam allowance that is on the top (one right under my finger) is turned AWAY from me (and towards the presser-foot)? That is how you should try to sew whenever possible! In this case, as the presser-foot of the machine comes, it pushes slightly top fabric towards you and if seams are like this - it will push them to NEST. If it is the other way (top seam allowance towards you), it can push them apart (and therefore you wont have matched corners).
So here are my seams matched!!
Sew each segment to the next one and in this case - I did press these seams open! It seems to be the least bulk that way.
And here is how this looks after all the segments have been sewn together:
Weird, right?
But no worries, we will straighten this out - to the cutting board!!
Place one end of your sewn runner on the cutting board and place the ruler at the first FULL WIDTH point, like this:
More precisely, place the first 1/4" line of the ruler on the points of squares (so the tips will be preserved later) and then cut off this "triangle"
Now that triangle that you just cut off - place it to the OTHER end of the runner.
It matches perfectly!! YAY!!
All you need to do is sew this triangle to the other end (and it is just the same sewing as you did before)
And your table runner is DONE!!
So - what do you think?
Isn't this a fun project? Great strip-piecing way to make the job easy, right?
Now, you might have few questions... he...he...
First - what do I do with these zig-zag edges?? You can cut them off of course, before of after the quilting, depending on weather or not you want to add borders to this.
Second one - some of you might think this is somewhat familiar? Yes, it is! I did a similar table runner as one of the holiday project tutorials (in 2011). It was a more traditional looking version and also one with borders - so for the look at that one and borders version, look
HERE .
With this one, when it came to borders treatment and quilting, I wanted to play a little!
First, this version has two outside strips wider than the rest (in original version all strips are 2 1/2") and that created a bit more of a "negative space"? Don't you think? I had all kinds of ideas what to do with that, in terms of quilting and even the finish... but then, ideas change!! Ha ha!
One thing that didn't change though - going back to my Aurifil stash to look for beautiful colors for quilting!! Here are some choices:
Narrowed it down a bit (oh but only a bit!) here. I could see small bits of that green in fabrics (can you see it there, right by the thread?), but seemed not enough to use the green...
So here is what I did:
Quilted some flowers in purple, inspired by the floral print, some teardrops and arches in that beautiful teal and some more teardrops and curlicues on white using that gentle mint color...
Yeah, you saw that right - I kept the zig-zag edges... Crazy! I did not intend to do it, but kinda lost track while quilting, having fun with curlicues and such, I had so much fun! ... and then didn't want to cut them off! As I said - crazy.
So what does one do - some more crazy! I decided to add a chenille yarn edge! Simply stitched the green chenille yarn to the edge, using a wide zig-zag stitch:
Well, this got really long really fast, but I hope you like these few tips about strip-piecing and this quick table runner project.
Let me know what are your thoughts and if you have more good tips about strip piecing.
As promised, more tutorials coming real soon, so stay tuned!
Thank you for spending time with me and have a great weekend,
Marija
.jpg)
.jpg)
.jpg)


.jpg)
.jpg)


.jpg)
.jpg)
.jpg)
.jpg)
.jpg)
.jpg)
.jpg)
.jpg)
